The need to format the computer occurs when the computer is infected with a virus, when the computer is slow enough or the computer software does not run properly. Today, we are going to tell you in this article how you can format your computer very easily, for which you have to follow the steps given below.
How to format a computer
1. First of all, you have a CD of Windows 7, Windows 8 or Windows 10, driver CDs of all peripherals in the computer, and the rest of the necessary software like Microsoft Office. You should also backup your computer’s data before formatting. Put DVD of your computer’s DVD ROM drive into Windows 7, Windows 8 or Windows 10 (whichever is available to you).
2. Restart the computer and as soon as it starts, it will go into setup. For this, according to the instructions at the bottom of the screen, do the following. Usually it will be F2 / F10 or Del Key. As soon as you go into this setup, you will need to select the Boot Order menu, which is usually found in the Storage menu or the Advanced menu. Go to the Boot Order menu and create the DVD option for DVD ROM, which will read directly to your DVD Rom when the computer boots, not the hard disk.
Must Read: How to Recognize Virus Spyware Attack yourself
3. You can also get information from your computer manual or computer motherboard manual for the first two steps, because the method of doing this step is different in every computer.
4. Now on startup, the computer will be boot from the DVD ROM and not boot (start) from the hard disk. As soon as the computer starts and the DVD will read the ROM, a blue screen will emerge. The names of many files will continue to come in one place at the bottom part of the screen, because the setup program will read the Windows files from DVD Rom.
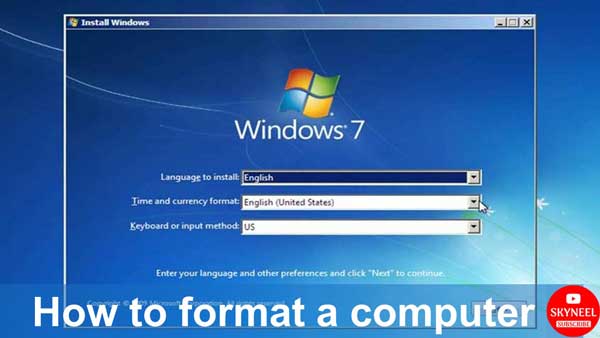
5. After some time you will get Welcome to Setup screen, you will see three options in it. Press Enter to open Video in first option, press R to repair in second option and press F3 to come out in the third option. Press Enter here, after which the screen of the Windows Licensing Agreement will appear. Then click on NEXT.
6. Now the hard disk partitions will appear. If you are installing Windows for the first time, you will see the size of the Unpartitioned Space option and disc in the box on this screen. If the same operating system was already in the computer then all the previously created partitions would be visible. Press C on this screen. You will now have the Create Partition of size (MB) box in front of you. Here you want to create a partition of Mega byte (like 40 GB) then you enter 409160 MB and press Enter.
7. You will come back to the previous screen. The size of the size of the size of the size of the size you will see, and the remaining space of the hard disk will be visible in the Unpartitioned Space. You can create another partition by pressing the C key and selecting Unpartitioned Space.
Must Read: How to use twitter
8. Now select the partition on which Windows should be installed, then press Enter. On the screen you will get 2 positions format and delete You press Enter on the format. Once you press Enter, it will format the drive and setup will start copying the files to the hard disk.
9. After a computer restart, Windows Graphical Interface will come in a while. some time you will see Regional and Language Options, here you click Next. After this will come Personalize Your Software screen. Here you write your name. The name of the organization can leave blank. Now click on Next again, after which your Product Key option will appear. Enter the Windows key found here with your software’s DVD. On the next press, the Computer Name and Administrator Password will appear. Now enter the name you want to give to the computer in the Computer Name text box. Under this, you enter your administrator password. On pressing Next you will get the Date and Time Settings Dialog screen. Here you set your computer’s date and time and select GMT +5: 30 Chennai, Kolkata … option in the Time Zone Combo box.
10. Pressing Next Now, Windows will start installing your network software. After this, the network settings screen will appear in front of you. Here, let’s select the default setting Typical Settings and click on Next option. After that, the Workgroup or Computer Domain will come. Change here without changing anything and press next. After that, Windows will copy many remaining files.
11. After a while the computer will restart, followed by the Display Settings message box. Press Ok here. After that, after pressing Ok, Windows will set the screen resolution according to your display card. Next, press Next. Help Protect Your PC In the Screen Help Control my PC by Turning … Select the option. Press Next, then the Checking the Internet Connectivity screen will appear. Here you have to select the DSL option according to your computer’s internet connectivity. Here you can also select the Skip option. Now Ready to Register with Microsoft will be screened. Here you select No Not At This Time Option.
12. Pressing Next will bring you Who Will Use This Computer screen. Here you can add 5 user names. Next, press Finish on the next and next screen. The desktop of Windows will come in front of you.
Must Read: Smartphone can harm your neck and eyes disease, be careful
In this article, we have told you about format a computer. If you liked this article, you can also like our Facebook page and also subscribe to our YouTube channel. If you have any problems related to this article, you can tell us by commenting.